
A properly built acrylic should be about the thickness of a credit card at the cuticle and free edge, with a visibly higher apex at the stress area. That apex, combined with a balanced C-curve and even lateral structure, is what keeps a set strong without feeling bulky. Look at your nail from the side and ask your tech where the apex sits before you leave the chair.
TL;DR:
- Keep the cuticle and free edge near credit card thickness, while the apex sits visibly higher over the stress area.
- A C curve between 30% and 50% helps distribute pressure; ask your technician to build your preferred curve before application begins.
- Longer extensions need a higher apex closer to the free edge, while shorter nails generally place it nearer the cuticle.
- A rigid, uniformly thick nail or early cuticle lifting can signal poor blending; request a thin perimeter and reinforcement at the stress area.
Table of Contents
- What determines acrylic thickness: apex, stress area, and C-curve
- A simple rule of thumb you can check yourself
- How technicians control thickness during application
- Signs of poor thickness and what to ask for instead
- How we build durable acrylics at Foxy Nails
- Thinner is not automatically better, and thicker is not automatically stronger
- Book a properly built acrylic set at Foxy Nails
- FAQ
- Sources
What determines acrylic thickness: apex, stress area, and C-curve
Acrylic thickness is not one number. It is a relationship between several structural zones that each do a different job. The apex is the highest point of the enhancement, usually placed over or near the stress area, and it is where most of the nail’s strength is stored. The stress area is the point where the free edge of your natural nail meets the acrylic, the spot that takes the most pressure from daily use. The lateral structure, meaning the sidewalls running along each side of the nail, needs to stay even and intact rather than filed thin, because removing it weakens the whole enhancement.
The C-curve, the side-to-side arch you see when you look at the nail from the tip, adds another layer of support. According to NailPro’s guidance on durable nail structure, C-curves between 30% and 50% give acrylic sets the stability they need to resist breakage, while a visible apex from every angle is a hallmark of a structurally sound set rather than just a styling choice.
These elements work together:
- The apex carries the load so the rest of the nail can stay thin.
- The C-curve distributes pressure across the width of the nail instead of concentrating it at one point.
- Even lateral structure keeps the sidewalls from becoming a weak point where cracks start.
- A thin, well-blended perimeter lets the acrylic flex slightly with your natural nail instead of fighting against it.
Understanding these zones is what separates a set that lasts from one that looks fine on day one and chips by week two.
A simple rule of thumb you can check yourself
You do not need a nail technician’s training to spot a well-built set. A few visual checks tell you most of what you need to know.
- Compare the cuticle area to a credit card. The thickness there should be close to that of a standard card, not noticeably thicker.
- Check the free edge the same way. It should taper to roughly the same slim profile, not feel like a thick plastic cap.
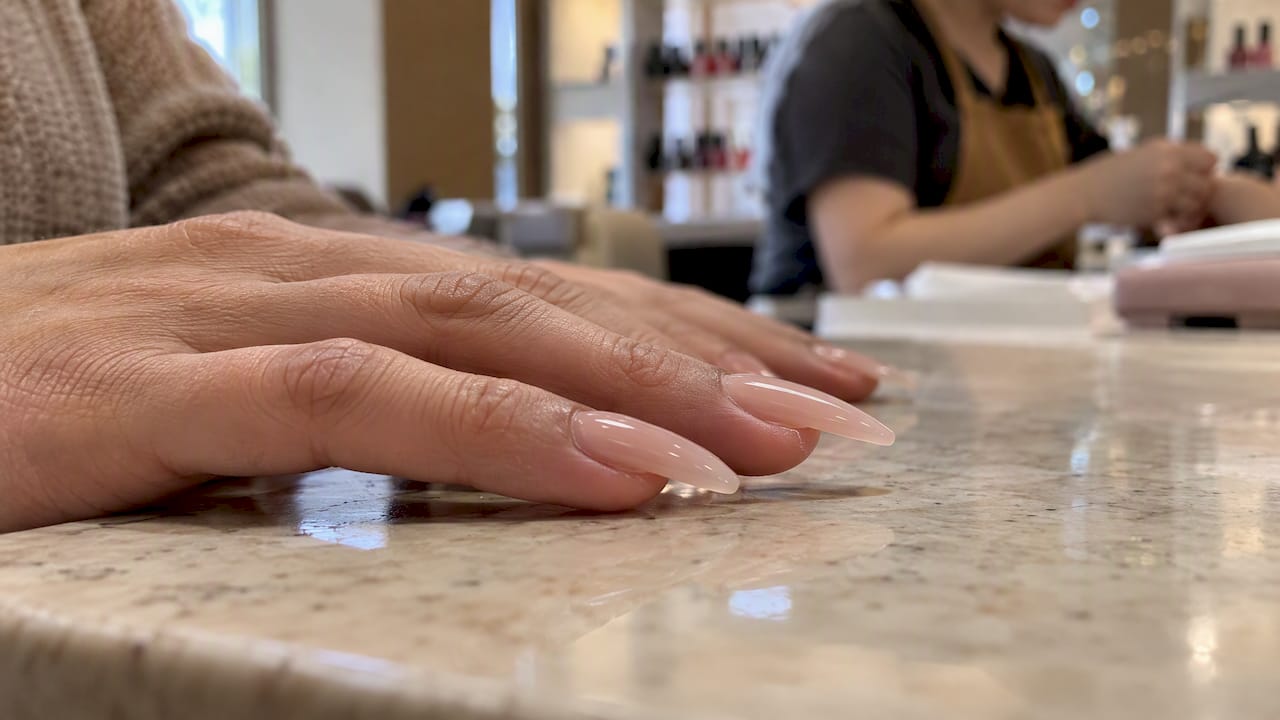
- Look at the nail from the side. You should see a clear rise at the apex, usually around the stress area, higher than the cuticle and free edge.
- Ask where the apex sits if you are getting length. Longer extensions need a higher, longer apex placed closer to the free edge to support the extra leverage.
Pro Tip: A visible apex is not the same as a bulky nail. If the whole nail feels thick and rigid rather than having one higher point, the product was not blended correctly.
Shorter nails usually carry the apex closer to the cuticle, while longer extensions shift it forward. Either way, the goal is contrast between the thin areas and the reinforced zone, not uniform bulk.
How technicians control thickness during application
A well-built set is not an accident. It comes down to a handful of deliberate steps that most clients never see up close.
- Form and tip alignment. The form or tip has to sit flush against the natural nail with no gaps, since a misaligned base forces extra product to fill space that should not be there.
- Oversized tips get adjusted, not just glued on. A tip that’s too wide for the nail bed distorts the lateral structure from the start.
- The apex is built with the first bead or two of product, placed at or near the stress area, then blended outward so the perimeter thins naturally rather than being filed down after the fact.
- Mix ratio and product wetness affect spread. A wetter mix flows and self-levels more, while a drier mix holds its shape and builds height faster, so the ratio a tech uses directly changes how much filing is needed afterward.
Pinching for the C-curve is one of the more skill-dependent steps. According to NailPro’s technique coverage, timing matters more than pressure: pinch too early and the still-soft product smashes out of shape, pinch too late and the product has already set, so forcing a curve at that point stresses the natural nail underneath. Technicians typically use pinching tongs or C-curve sticks during the brief window when the product is firm enough to hold a shape but still pliable enough to move.
Pro Tip: If you want a deeper C-curve, mention it before application starts. Pinching after the fact is harder on your natural nail and less reliable than building the curve in from the first bead.
The apex also moves depending on your nail length. Experts interviewed by NailPro note that longer nails call for the apex to sit higher and closer to the free edge, since that is where the leverage and stress concentrate most on an extended nail.
Signs of poor thickness and what to ask for instead
Some problems are easy to spot before they turn into a broken nail or a salon visit for repair. According to NailPro’s reporting on acrylic application, overly thick acrylic that is not blended at the perimeter is a common cause of premature lifting, because the rigid coating cannot flex with your natural nail as it grows.
Watch for these signs:
- Lifting at the cuticle within the first week, which often points to product that was applied too thick or not blended into the natural nail.
- Chips or cracks along the sidewalls, suggesting the lateral structure was filed too thin or never built up evenly.
- A rigid, inflexible feel across the whole nail, rather than one raised apex, which means the product was built up everywhere instead of targeted at the stress area.
Instead of accepting a bulky set as “just how acrylics feel,” ask for proper nail prep, a thin and blended perimeter, and a clearly placed apex and C-curve. NailPro’s advice on mastering acrylic application makes the point directly: the stress area is where the bulk of product belongs, while the arch’s position is more about aesthetics and should never be overbuilt just to look dramatic.
Refills are part of prevention, too. Most sets need a rebalance before regrowth creates a gap that pulls on the apex or distorts the C-curve, and our acrylic fill guide walks through what that timing looks like in practice.
How we build durable acrylics at Foxy Nails
We treat apex placement and form alignment as the foundation of every acrylic set, not an afterthought once the shape looks right. Our approach keeps the stress area reinforced while the cuticle and free edge stay thin, so a full set holds its structure through regular wear. We walk through form placement and C-curve preferences before application starts, because a set built with the right structure from the first bead lifts less and lasts longer. For more on upkeep between visits, our complete acrylic guide covers what to expect at each stage.
Thinner is not automatically better, and thicker is not automatically stronger
The most common misconception about acrylic thickness is that more product means more durability. It’s the opposite: an evenly bulky nail is often weaker than a thin one with a well-placed apex, because rigidity without flex is exactly what causes lifting and cracking at the sidewalls. The conventional advice to “ask for a thin set” misses the point if it ignores the stress area entirely. A nail that’s thin everywhere, including where it needs reinforcement, will fail just as fast as one that’s thick everywhere.
What matters most is contrast: thin at the cuticle and free edge, reinforced at the stress area, consistent along the sidewalls. If you take one thing from a salon visit, make it this: look at your nail from the side before you leave and confirm you can actually see that higher point. A set that looks flat and uniform from the side, no matter how thin it feels at the tip, is more likely to chip at the stress area within a week or two.
— Cuong
Book a properly built acrylic set at Foxy Nails
If you want a set that holds its shape and resists lifting, the structure matters more than the polish color. We build every acrylic set around correct apex placement and a blended, thin perimeter, and ensure your preferences for length and curve are part of the plan from the start.

We also offer gentle options for younger clients and a welcoming space for anyone newer to acrylics. Browse our full set and refill services or visit our acrylic nails guide to book your next appointment.
FAQ
How thick should acrylic nails actually be?
The cuticle and free edge should be close to the thickness of a credit card, with a visibly higher point at the apex near the stress area. This contrast, thin at the edges and reinforced in the middle, is what gives a set strength without unnecessary bulk.
What is the apex on an acrylic nail?
The apex is the highest point of the enhancement, typically placed at or near the stress area where your natural nail meets the acrylic. According to NailPro, it is the area that holds the most strength, and its position shifts closer to the free edge as nail length increases.
Why does my acrylic nail feel too thick or rigid?
A rigid, uniformly thick feel usually means the product was built up across the whole nail instead of concentrated at the stress area. NailPro’s reporting notes that acrylic left thick and unblended at the perimeter is a common cause of premature lifting.
What is a C-curve and why does it matter for thickness?
A C-curve is the side-to-side arch visible when you look at a nail from the tip, and it helps distribute stress across the nail rather than concentrating it at one point. Structural guidance from NailPro points to a range between 30% and 50% as supportive for most acrylic sets.
How often should I get an acrylic refill to maintain proper thickness?
Refill timing depends on your nail growth and how quickly the apex shifts out of position as the natural nail grows forward. Our acrylic fill guide outlines the signs that a rebalance is due before lifting or an uneven profile sets in.