
3D nail art is sculpted, raised decoration built with low-viscosity, non-self-leveling gel that holds its shape instead of flattening out like polish. Simple pieces, a single flower or a scattered pearl, are doable at home with the right 3D sculpting gel. Anything layered, tall, or loaded with charms belongs in a salon chair, where a professional set can hold its shape for up to about three weeks.
TL;DR:
- Using a thick, no-flow 3D sculpting gel is essential for creating detailed, shape-holding nail motifs like flowers or drops that can last up to three weeks.
- Proper prep, thin layered building, and sealing edges with soft builder gel significantly reduce lifting, cracking, or slumping of 3D elements.
- The most demanding 3D designs involve multiple layered elements or heavier charms, which are best made in a salon setting by professionals.
- Costs vary widely from 75 to 300 dollars depending on complexity, with longer and more elaborate designs lasting about three weeks with proper maintenance.
- When removing 3D nail art, using professional tools and avoiding peeling protects natural nails and ensures longer-lasting nail health.
Table of Contents
- What Is 3D Nail Art and How Is It Different From Regular Gel?
- How Do You Sculpt a Basic 3D Nail Design Step by Step?
- What Are the Best 3D Nail Art Designs to Try?
- How Much Does 3D Nail Art Cost and How Long Does It Last?
- How Do You Maintain 3D Nail Art and When Should It Be Removed?
- Why Do 3D Elements Lift, Chip, or Slump, and How Do You Fix It?
- What Do Nail Techs Actually Think About 3D Trends?
- What Should You Expect at a 3D Nail Appointment?
- Ready for a Salon-Quality 3D Manicure?
- Where 3D Nail Art Trends and Techniques Come From
- Why 3D Nail Art Deserves More Respect Than It Gets
- Sources
What Is 3D Nail Art and How Is It Different From Regular Gel?
The term covers several techniques, and mixing them up is the fastest way to buy the wrong product. 3D sculpting gel is a thick, no-flow formula that stays exactly where you place it under the lamp instead of settling flat like builder gel or regular polish. Builder gel, by contrast, is better at adding subtle strength and height across the whole nail, and it’s the workhorse behind bolder sculpted pieces like flowers, cherries, and pearls when technicians want more structure under a design.
Acrylic can achieve similar raised effects, but it dries faster and forgives fewer mistakes, which is why most technicians point beginners toward sculpting gel first. It holds fine detail, like petal edges or tiny ridges, more reliably than acrylic and gives you more working time before it sets.
Here’s what actually separates the products worth buying from the ones that waste your money:
- 3D sculpting gel (no-flow, high-viscosity): builds petals, drops, and raised motifs that keep their shape.
- Builder gel: adds height and strength, often used as a base layer or for chunkier 3D pieces.
- Hard gel or acrylic: better for structural extensions than fine sculptural detail.
- LED/UV lamp, ideally 36 to 48 watts, for full cure through thicker layers.
- Silicone sculpting tools, fine detail brushes, and dotting tools for shaping petals, drops, and lines.
- Slip solution or 70% isopropyl alcohol to smooth gel and clean brushes between passes.
- Rhinestone or gem gel for setting charms and stones without visible glue lines.
Skip anything marketed with vague language like “long-lasting formula” and look instead for specifics: is it labeled soak-off or file-off, what’s the recommended cure time, and does the brand disclose viscosity. Those details tell you more than any packaging claim.
How Do You Sculpt a Basic 3D Nail Design Step by Step?
A clean base is what separates a design that lasts three weeks from one that lifts in three days. Here’s the sequence most technicians follow, and one you can talk through with your own tech before an appointment.
- Prep the nail. Push back cuticles, lightly buff the surface, and dehydrate with alcohol or a prep solution so the base coat has something to grip.
- Apply and cure a base coat fully before touching any 3D gel. Skipping this step is the single biggest cause of early lifting.
- Pick up a controlled bead of 3D gel on your tool. Less is more here. A pea-sized amount goes further than it looks like it should.
- Mold in thin sections. Build petals or drops in layers rather than one thick blob, flash-curing for a few seconds between passes to lock each layer in place before adding the next.
- Check cure depth. A dependable 3D gel should cure through about 3mm of thickness in roughly 90 seconds under a 48W LED lamp. If the center still feels tacky or gives under light pressure after that window, it needs more time under the light, not less gel next time.
- Seal the edges. Where a charm or gem meets the nail, technicians commonly brush a thin fillet of soft builder gel under the edge before the final top coat, which closes the gap where lifting usually starts.
- Finish with top coat over the entire design, including the raised sections, for shine and an extra layer of protection.
Pro Tip: Test any new sculpting gel by shaping a small petal and letting it sit for 60 seconds before curing. If it slumps or spreads before you get it under the light, the viscosity is too low for anything more complex than a flat accent.
If your design involves multiple layered elements, metal charms heavier than a small stud, or you’re not confident judging cure depth by feel, that’s the point to book a salon visit instead of pushing through at home.
What Are the Best 3D Nail Art Designs to Try?
Certain motifs show up again and again for good reason: they photograph well, they suit a range of nail lengths, and technicians can execute them reliably. Design trends right now lean toward blooming florals, pearls, chrome accents, and water-drop textures, and most of these adapt to shorter nails with small adjustments in scale.
A few clusters worth screenshotting for your next appointment:
- 3D flowers, built petal by petal in sculpting gel, work on almost any length when kept small and close to the nail bed.
- Dewdrops or water droplets, a clear gel dome that catches light, suit both short and long nails and rarely snag.
- Pearls and delicate chains, set with rhinestone gel, add texture without much added height.
- Fruit charms, cherries and lemon slices, tend to look best on longer nails where there’s room for detail.
- Raised chrome accents, a sculpted swirl or line finished with chrome powder, read as bold even in a single-nail accent.
- Sweater-knit textures, a fine crosshatch pattern in gel, are trending for fall and winter sets and stay low-profile enough for everyday wear.
If you’re working with shorter nails, scaled-down versions of florals and dewdrops hold up better than anything tall or heavy. For a broader look at what short-nail sets can carry, these acrylic ideas show how much detail still fits in a compact shape. Prefer texture over height? A press-on base with pre-built 3D elements is a practical shortcut when you want intricate detail without a long appointment, as long as the press-on is prepped and fitted properly before application.
How Much Does 3D Nail Art Cost and How Long Does It Last?
Price swings widely because complexity, not the base service, drives the cost. A full set with layered florals, multiple charms, and chrome work costs more than a single accent nail with one small gem.
-
Price range: roughly $75 to $300, depending on how many nails get 3D treatment and how elaborate the design is.
-
What raises the price: multiple accent nails, custom sculpting versus pre-made charms, added height, and specialty finishes like chrome or hand-painted detail.
-
Appointment length: simple accent designs can add 20 to 30 minutes to a standard manicure; full sculpted sets with multiple elements can run well past an hour.
-
Longevity: a professionally applied set can last up to about three weeks, while press-on 3D designs with good care typically hold for around two weeks.
Daily habits matter more than most people expect, which is exactly why the next section matters just as much as the appointment itself.
How Do You Maintain 3D Nail Art and When Should It Be Removed?
Small habits add real weeks to a set. Skip alcohol-based hand sanitizers where possible since repeated exposure dries out the seal around gems and edges, and reach for lotion daily to keep the surrounding cuticle and skin from cracking. Wearing gloves for dishes, gardening, or cleaning protects raised elements from the exact snagging and impact that causes chips.
- Moisturize cuticles and nail edges daily to prevent dryness-driven lifting.
- Avoid excess alcohol sanitizer contact with sealed edges and charms.
- Wear gloves for household chores, especially anything involving water or friction.
- Watch for lifting, chips, or a gem that feels loose, and get it addressed early instead of waiting.
When it’s time to remove a set, resist the urge to peel or pry. Technicians rely on an e-file paired with specialized pliers to break down gel and charms safely, which protects the natural nail underneath in a way that picking never does. A brushless e-file in particular gives technicians more control and less heat buildup during removal, which matters even more with dense 3D builds.
Why Do 3D Elements Lift, Chip, or Slump, and How Do You Fix It?
Slumping and soft centers usually trace back to one habit: building in thick layers instead of thin ones. Go back to flash-curing each section before adding the next, and the problem tends to disappear.
Lifting and gem loss almost always start at an unsealed edge. Adding that fillet of soft builder gel under a charm before top coat, rather than relying on top coat alone, closes the gap where moisture and impact get in.
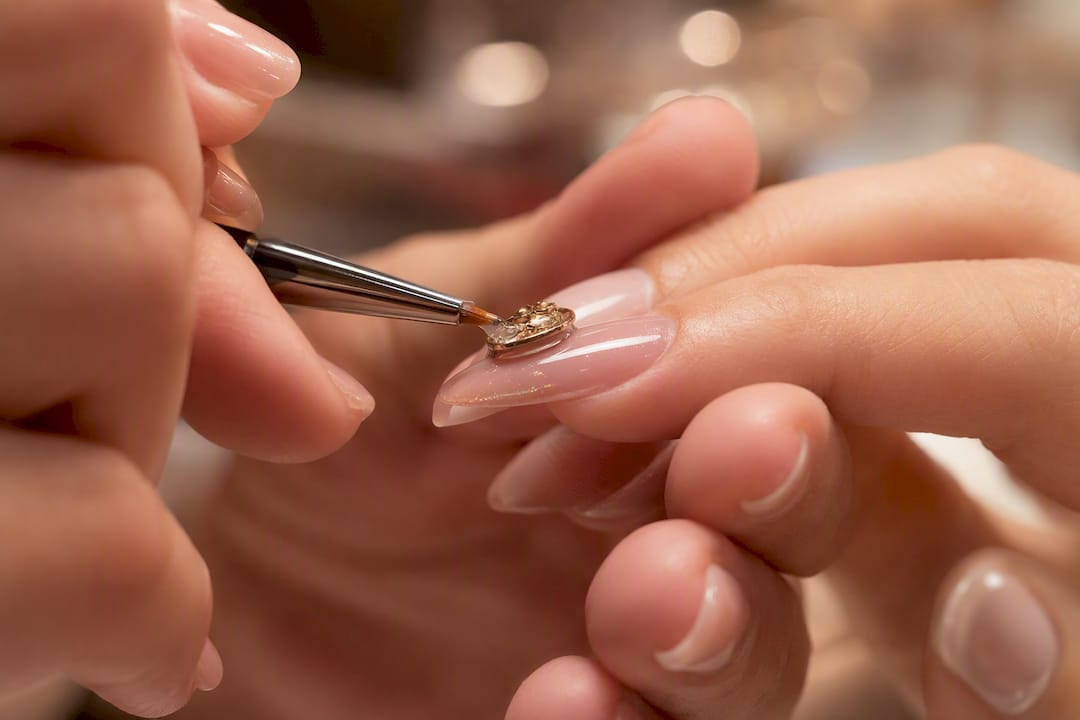
Pro Tip: If a design keeps snagging on clothes or hair, the height is the problem, not the adhesive. Scaling down the sculpted element rather than reinforcing it with more gel almost always solves recurring breakage.
What Do Nail Techs Actually Think About 3D Trends?
Cuong from Foxy Nails notes that chrome accents, pearls, and scaled-down 3D details on shorter nails are what clients ask for most right now. Salons lean on no-flow sculpting gel over acrylic for detail work, cured under higher-wattage lamps for consistent results. Watching the process helps, and Foxy Nails posts technique videos for exactly that reason. Complex builds and safe removal are best left to a technician.
What Should You Expect at a 3D Nail Appointment?
A typical 3D appointment covers prep, sculpting, sealing, and, when it’s time, professional removal, all in one visit. Bring a reference photo and know roughly how much height you want before you sit down. It saves time and gets you closer to the design you actually pictured. Watching a few videos beforehand or asking questions during a consult makes that conversation even easier.
Ready for a Salon-Quality 3D Manicure?
Many salons offer sculpted, long-lasting versions of the designs covered above, which avoid issues like soft centers, lifting charms, or wasted gel from trial-and-error viscosity testing.

Booking is simple: when you schedule, tell us the design you have in mind, the height you want, and whether you’re picturing built-on sculpting or a press-on base. That gives your technician everything needed to plan the appointment length and gel choice in advance. Start with our manicure and pedicure booking page to pick a time, or browse our nail extension options first if you’re still deciding between a built-on 3D set and a Gel X base with added detail on top.
Where 3D Nail Art Trends and Techniques Come From
The technique explanations and sourcing details in this guide draw on a few dedicated resources worth bookmarking if you want to go deeper: Hanyinails’ sculpted gel breakdown for product mechanics, Glamour’s cost and maintenance guide for real-world expectations, and InStyle’s builder gel design roundup for current motif inspiration.
Why 3D Nail Art Deserves More Respect Than It Gets
Most coverage of 3D nail art treats it like a purely visual trend, a scroll-stopping photo and nothing more. That undersells what’s actually happening on the nail. Getting a petal to hold its shape for three weeks without slumping or cracking is a materials science problem as much as an artistic one, and the gap between a design that looks good in a photo and one that survives three weeks of dish-washing and typing is almost entirely about cure discipline and edge sealing, not artistic skill.
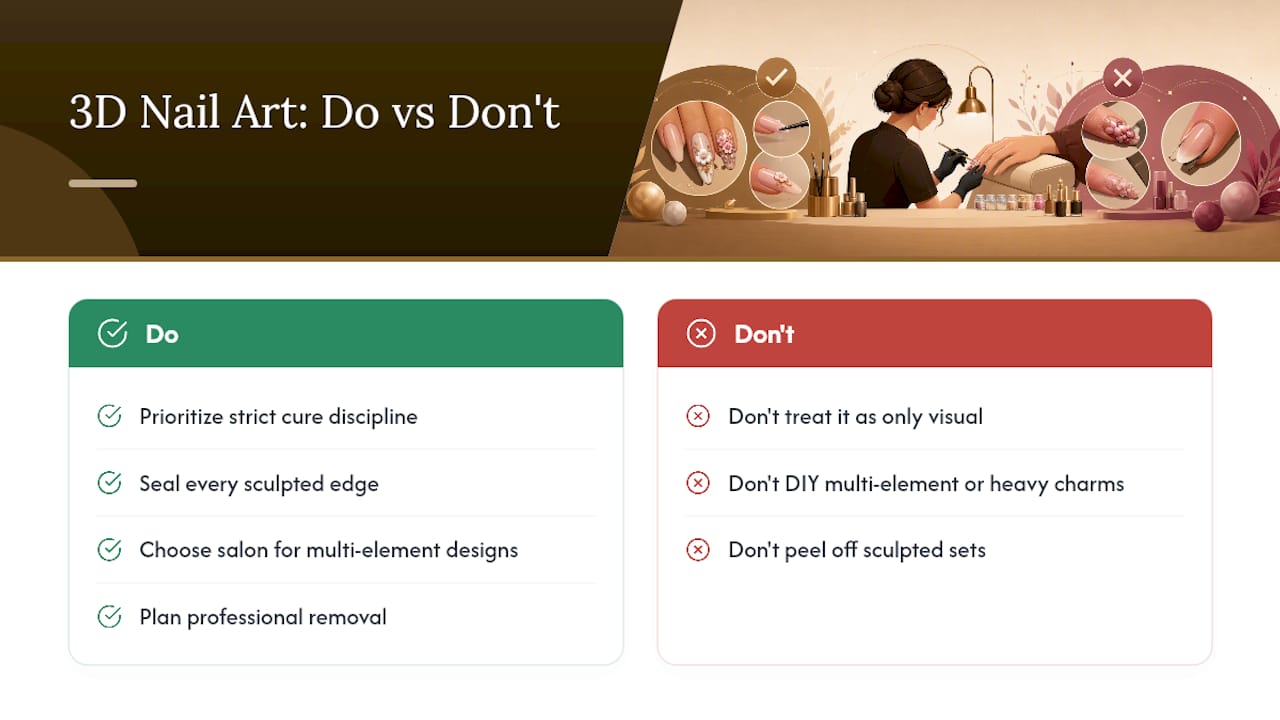
I’d also push back on the idea that DIY and salon work are competing for the same job. They’re not. A single dewdrop accent or a small scattered pearl is genuinely a reasonable weekend project. But the moment a design involves more than one sculpted element per nail, or any charm heavier than a small stud, the math changes, because every additional layer is another chance for an uncured center or an unsealed edge to fail. That’s not a knock on DIYers. It’s just what the gel and the lamp physics actually allow.
The other thing worth saying plainly: removal is not optional maintenance, it’s part of the design’s safety profile. Peeling off a sculpted set yourself doesn’t just risk the polish. It risks the nail plate underneath, and that damage takes far longer to grow out than any 3D design takes to wear off.
— Cuong
Sources
- What Is 3D Gel Nail Art? Sculpted Gel Nails Explained – Hanyinails
- What Is 3D Nail Art? Costs, Maintenance, Ideas, and More | Glamour
- 23 Builder Gel Nail Ideas for an Incredible 3D Manicure – InStyle