
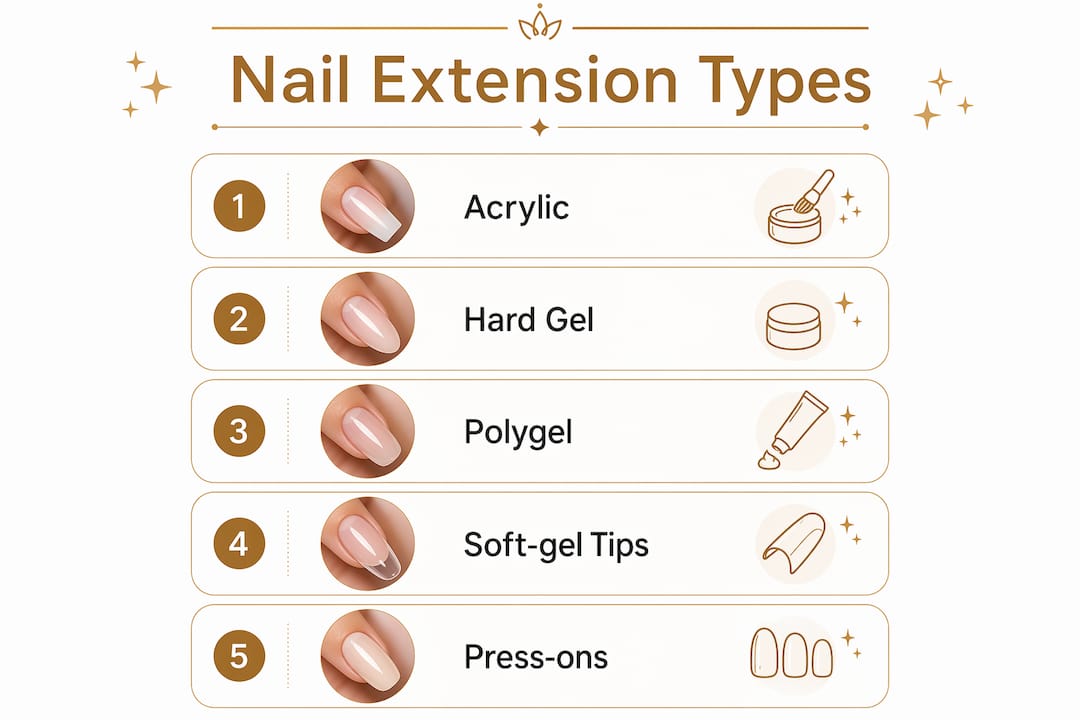
The four main professional nail extension methods are acrylic, hard gel, polygel, and soft-gel tips (commonly called Gel-X). Press-ons are a separate, more temporary DIY/consumer category rather than a core salon extension method. For a DIY beginner, soft-gel tip kits or press-ons are the safest starting point. If you want maximum longevity and see a pro regularly, acrylics or hard gel deliver. For natural-nail health above all else, soft-gel tips are the gentlest option because they flex with the nail and soak off without heavy filing.
The single most important decision in nail extensions is not which type you pick — it’s how you remove them. Proper removal, whether soak-off or professional filing, determines whether your natural nail comes out intact or thinned and damaged.
Quick tradeoffs at a glance:
- Durability vs. flexibility: Acrylics and hard gel are the toughest; soft-gel tips and polygel flex more, which actually reduces breakage risk in daily life.
- Removal complexity: Press-ons and soft-gel tips soak off easily; hard gel requires professional filing.
- DIY realism: Press-ons and soft-gel tip kits are genuinely beginner-friendly; sculpted acrylic and hard gel are not.
Table of Contents
- What are the main types of nail extensions?
- How are nail extensions applied?
- How long do extensions last, and what do they cost?
- What do you need in a DIY nail extension kit?
- How do you remove nail extensions safely?
- How do you choose the right extension method?
- What does Foxynailsreno recommend for your goals?
- Key Takeaways
- Foxynailsreno brings expert extensions to Reno
What are the main types of nail extensions?
Nail extensions fall into two structural approaches: tips (pre-shaped pieces attached to the nail) and forms (a scaffold wrapped around the fingertip that you build on). Most salon methods use one or the other as a base, then apply a product on top. Here’s what each major type actually involves.
Acrylic
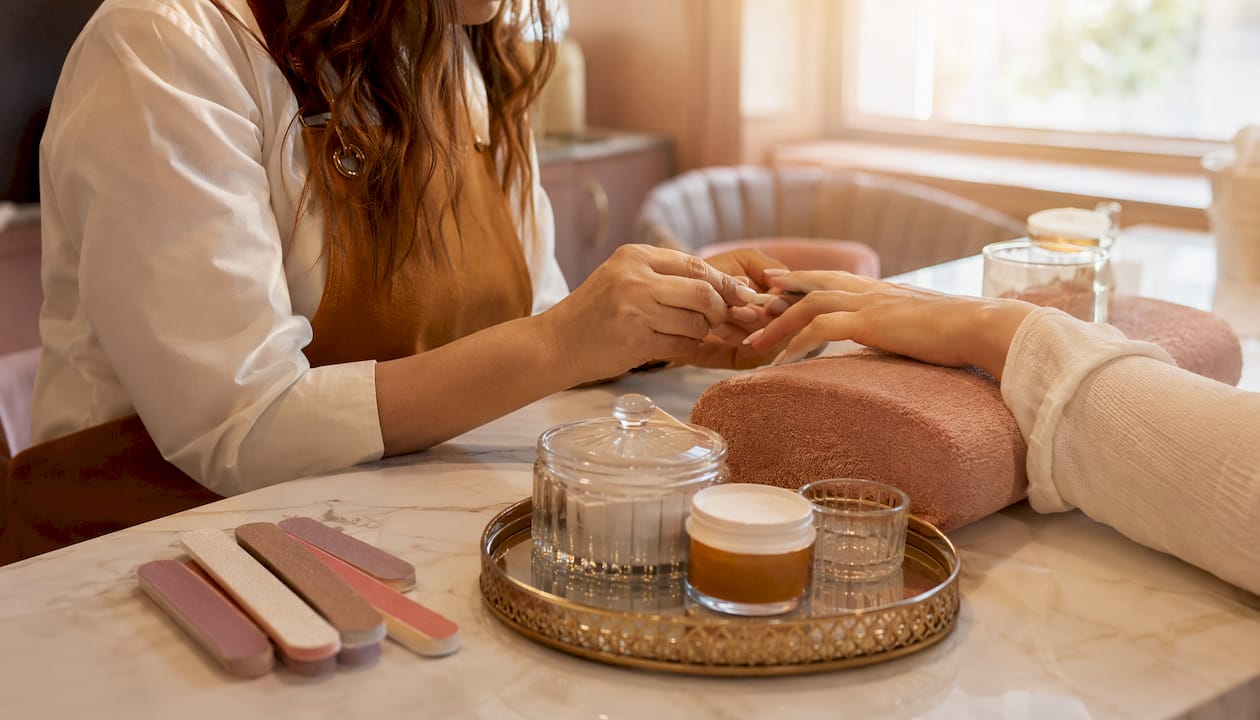
Acrylic nails are built by mixing a liquid monomer with a polymer powder to create a workable bead, which a technician sculpts over a tip or form. The product air-dries without any lamp. The result is extremely hard and durable, and the length and shape options are nearly unlimited.
Pros:
- Longest-lasting of all types before a fill is needed
- Highly customizable shape and length
- Widely available at salons across the U.S.
Cons:
- Strong chemical odor during application
- Mechanical removal (filing) carries real risk of nail plate thinning if done carelessly
- Heavier feel than gel-based options
Hard gel
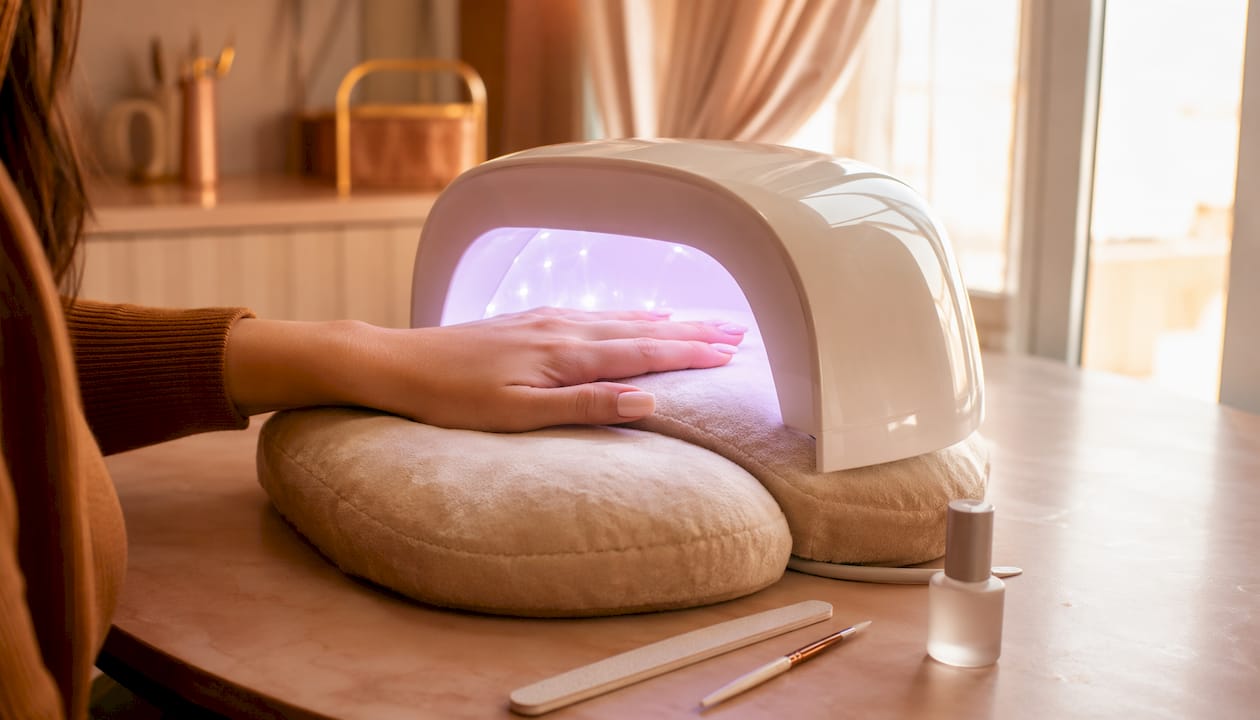
Hard gel is applied in layers and cured under an LED or UV lamp. It cures to a rigid, durable finish similar to acrylic but with less odor. Unlike soft gels, hard gel is not soak-off soluble, so removal always requires filing or e-filing.
Pros:
- Lighter and more natural-looking than acrylics, with a high-gloss finish
- Less odor during application
- Excellent for overlays and extremely long-lasting pedicures
Cons:
- Requires professional removal to avoid plate damage
- Steeper learning curve for DIY application
Polygel
Polygel is a hybrid product that comes in a tube with a putty-like texture. It combines the workability of acrylic with the lighter weight of gel, and it cures under an LED or UV lamp. Because it does not self-level the way liquid acrylic does, it gives you more working time before curing, which beginners often appreciate.
Pros:
- Lighter than acrylic, stronger than soft gel with more flexibility than hard gel
- Longer working time before cure
- Soak-off removable with acetone
Cons:
- Requires a slip solution to work the product, adding a step
- Less widely available in starter kits than soft-gel tip systems
Soft-gel tips (Gel-X)
Soft-gel tips are pre-formed, full-coverage tips made from flexible gel. A gel adhesive bonds the tip to the natural nail, and the whole unit cures under a UV or LED lamp. The flexibility is the key structural advantage: the tip acts as a shock absorber, reducing the risk of traumatic nail fractures compared with rigid acrylics. Gel-X, introduced around 2017, is the most recognized soft-gel tip system.
Pros:
- Most natural feel and appearance of any extension type
- Soak-off removal in acetone, no heavy filing required
- Faster application than sculpted methods
Cons:
- Less durable than acrylics or hard gel for very long lengths
- Requires a UV or LED lamp even for at-home kits
Press-ons
Press-on nails are pre-shaped, pre-finished tips attached with adhesive tabs or nail glue. Modern gel-adhesive press-ons have narrowed the gap with salon extensions considerably for short-to-medium lengths, though they typically last about 1–2 weeks. They are the only extension type that requires zero tools or curing.
Pros:
- Zero skill required; genuinely instant application
- Easily removed at home with a cuticle pusher or warm water soak
- Most affordable option by far
Cons:
- Shortest wear time of any method
- Limited customization compared with sculpted or gel-tip systems
Pro Tip: If you have sensitive skin or a history of product reactions, look specifically for HEMA-free labeling on any gel-based kit. HEMA (hydroxyethyl methacrylate) is a common sensitizer in gel products, and repeated exposure can trigger contact dermatitis even in people who had no prior reaction.
How are nail extensions applied?
The application workflow varies significantly by method, and that gap is what separates realistic DIY options from techniques that genuinely need a trained hand.
High-level workflows
Acrylic: Prep (push back cuticles, buff, dehydrate) → size and attach tip or place form → apply bond/primer → sculpt acrylic bead over tip → allow to air-set (3–6 minutes) → file and shape → finish with gel color or top coat. OPI’s professional acrylic guide recommends a 180-grit file for initial shaping and a 100/180-grit buffer to smooth before finishing.
Hard gel: Prep → apply primer → apply gel in thin layers → cure each layer under LED/UV → file and shape → apply top coat and cure.
Polygel: Prep → apply primer → dispense polygel from tube → use slip solution to mold product over dual form or tip → cure under lamp → remove form → file and finish.
Soft-gel tips (Gel-X): Prep → apply pH bonder and acid-free primer → select correct tip size → apply gel adhesive to underside of tip → press onto natural nail at a 45-degree angle → cure under UV/LED lamp → trim and file to desired shape.
Press-ons: Prep (buff lightly, dehydrate) → select sizes → apply adhesive tab or nail glue → press and hold for 30–60 seconds → done.
Salon vs. DIY: what actually differs
A licensed technician brings an e-file, professional-grade lamps, and years of muscle memory for apex placement and cuticle-line precision. At home, you are working with hand files, a consumer lamp, and no second set of eyes. That gap matters most for acrylics and hard gel, where an uneven apex or over-filed natural nail causes real damage. For soft-gel tips and press-ons, the gap is much smaller.
Approximate time per method:
- Press-ons: approximately a short session for a full set
- Soft-gel tips: typically under two hours for a full set, including prep and cure time
- Polygel: around one to one and a half hours for a full set
- Hard gel: usually an hour to over an hour for a full set
- Acrylic: roughly one and a half to two hours for a full set, longer for complex shapes
- Fills/infills (any method): usually notably shorter than a full set
Statistic to know: A well-applied soft-gel tip set typically lasts 2–4 weeks, with three weeks being the widely cited maintenance sweet spot before the shifted apex starts increasing break and lift risk.
How long do extensions last, and what do they cost?
Longevity and cost are the two factors that most often tip a decision. Here’s the honest picture for each method.
Longevity and maintenance cadence
- Acrylic: 3–4 weeks before a fill; can be maintained with ongoing infills for months
- Hard gel: 3–4 weeks; requires professional filing for removal or major repairs
- Polygel: 2–4 weeks; soak-off removal makes home maintenance more accessible
- Soft-gel tips: 2–4 weeks, with three weeks as the structural sweet spot; beyond that, the grown-out apex increases lift and break risk
- Press-ons: 1–2 weeks under normal conditions
The most common causes of premature failure across all types are lifting at the cuticle line (usually from inadequate prep or skipping dehydrator), an improperly built apex that concentrates stress at the wrong point, and overdue fills that let the grown-out gap weaken the structure. Daily cuticle oil, avoiding prolonged water exposure, and not using your nails as tools measurably extend wear across every extension type.
U.S. cost ranges
Prices vary by region, salon tier, and nail length, but these ranges reflect what most U.S. clients encounter:
- Press-on kits (DIY): $8–$25 per kit at drugstores or beauty supply stores
- Soft-gel tip starter kits (DIY): $40–$80 for a kit including lamp, tips, gel adhesive, and files
- Polygel starter kits (DIY): $35–$70
- Salon full set (acrylic): $45–$85 at standard salons; $80–$150+ at luxury salons
- Salon full set (hard gel or Gel-X): $60–$120
- Salon fills: $30–$65 depending on method and salon
- Kiara Sky gelly tip kits are a widely available example of soft-gel tip systems in the U.S., sold through beauty supply retailers and online, typically in the $40–$70 range for a starter bundle
Budget reality check: A salon acrylic habit with fills every three weeks runs roughly $600–$900 per year at mid-range U.S. pricing. A DIY soft-gel tip kit with replacement tips costs a fraction of that, though the time investment and learning curve are real.
What do you need in a DIY nail extension kit?
Soft-gel tip kits and press-ons are the two formats that are genuinely beginner-friendly at home. Sculpted acrylic and hard gel require tools and technique that take real practice to get right.
Essential kit items
- LED or UV lamp: Minimum 36 watts for reliable curing; underpowered lamps leave gel incompletely cured, which is both a durability problem and a potential sensitization risk
- pH bonder / dehydrator: Removes moisture and oils from the nail plate before application; skipping this step is the single most common cause of lifting
- Acid-free gel primer: Improves adhesion without the damage risk of acid-based primers
- Builder product: For beginners, a soft-gel tip kit (pre-formed tips plus gel adhesive) or a polygel tube; sculpted acrylic requires monomer and powder, which are harder to work with
- Nail tips or forms: Full-coverage soft-gel tips in multiple sizes; forms are needed only for sculpted methods
- Files and buffer: A 180-grit file for shaping, a 100/180-grit buffer for smoothing
- Acetone: For soak-off removal and cleanup
- Cuticle pusher and nippers: For prep
- Lint-free nail wipes: For cleansing between steps
What to look for in a kit
Kiara Sky’s gelly tip kits are a well-known example of the soft-gel tip format in the U.S. market, offering pre-formed tips in multiple shapes and a gel adhesive designed to cure under LED. When evaluating any kit, check that the lamp wattage is listed (36W minimum), that the gel is labeled soak-off or soft gel, and that the instructions specify cure times per layer. Avoid kits that bundle a lamp under 24 watts or that do not list HEMA content on the gel adhesive.
Pro Tip: For your first DIY set, start with short-to-medium length tips. Long extensions amplify every small error in apex placement and filing, and short extensions are far more forgiving while you build technique.
How do you remove nail extensions safely?
Removal method is the primary factor determining whether extensions harm your natural nail. The keratin layers of the nail plate are what you’re protecting, and every removal shortcut risks thinning or separating them.
Safe removal by method
- Press-ons: Soak fingertips in warm water for 10–15 minutes or apply cuticle oil around the edges. Gently lever with a cuticle pusher. Never force or peel.
- Soft-gel tips (Gel-X): File off the top coat and color layer. Soak cotton pads in acetone, wrap each finger in foil, and wait 15–20 minutes. The gel adhesive dissolves and the tip slides off with minimal pressure.
- Polygel: Same soak-off process as soft-gel tips. File the surface first to break the seal, then acetone-soak for 15–20 minutes.
- Acrylic: File down the bulk of the product, then soak in acetone for 20–30 minutes. The softened acrylic can be gently pushed off with an orangewood stick. Never pry.
- Hard gel: Hard gel is not acetone-soluble. A trained technician uses an e-file to reduce the product to a thin layer, then hand-files the remainder. Attempting this at home without an e-file risks filing directly into the natural nail.
Common removal mistakes
Peeling or forcing any extension off the nail is the fastest route to onycholysis, the separation of the nail plate from the nail bed. It is also how people end up with the paper-thin, white-streaked nails they blame on extensions in general, when the real culprit was the removal. Soak-off soluble soft-gel tips avoid the heavy e-filing that thins the plate, which is a meaningful structural advantage over hard gel and some acrylics.
When to see a professional for removal: Hard gel always. Acrylic sets that have been on longer than six weeks. Any extension where you see lifting with greenish discoloration underneath (a sign of bacterial or fungal growth that needs medical attention, not a nail appointment).
Pro Tip: After any soak-off removal, apply a keratin-strengthening treatment or nail bond for two to three days before your next set. The nail plate is temporarily more porous after acetone exposure, and a brief recovery window makes a real difference in long-term nail health.
Allergy warning: Incompletely cured gel products, particularly those containing HEMA, can trigger contact dermatitis on the skin around the nail. If you notice persistent redness, itching, or swelling during or after a gel service, stop use and consult a dermatologist before your next appointment.
How do you choose the right extension method?
The right method is the one that matches your nails, your schedule, and your honest skill level. Work through these questions before committing.
Questions to ask yourself
- How strong are your natural nails right now? Thin or damaged nails need a gentler method (soft-gel tips, press-ons) before graduating to acrylics.
- How long do you want the extensions? Very long lengths are best left to a professional with sculpted acrylic or hard gel.
- How often are you willing to maintain them? Acrylics and hard gel reward a consistent fill schedule; press-ons suit people who want flexibility.
- Do you have any history of skin or product sensitivity? If yes, prioritize HEMA-free products and patch-test before a full set.
- Do you have the tools? A quality LED lamp and proper files are non-negotiable for gel-based DIY.
Red flags that mean see a licensed technician
- You have visible nail damage, thinning, or separation from a previous set.
- You see any discoloration (green, yellow, or dark spots) under an existing extension.
- You have had an allergic reaction to a nail product before.
- You want a very long or dramatically shaped set (coffin, stiletto, extra-long almond).
- You need to remove hard gel extensions.
Which method fits which profile
Durability-first, sees a pro regularly: Acrylic or hard gel. Both last 3–4 weeks, handle daily wear well, and a skilled technician manages the removal risk. Check out the acrylic vs. gel comparison for a deeper breakdown.
Natural look, nail-health priority: Soft-gel tips. The flexibility reduces fracture risk, the soak-off removal protects the plate, and the finish looks closest to a natural nail.
Occasional wear, no commitment: Press-ons. Modern gel-adhesive press-ons last 1–2 weeks and come off cleanly.
DIY enthusiast who wants more than press-ons: Polygel or soft-gel tip kits. Both are forgiving enough for home application with the right lamp and prep.
How to vet a salon or kit: Ask the technician which specific product line they use and whether it is HEMA-free. For kits, read the ingredient list on the gel adhesive, not just the marketing copy. A kit that does not list the lamp wattage or cure times is a skip.
What does Foxynailsreno recommend for your goals?
At Foxynailsreno in Reno, NV, the team works with acrylic, hard gel, Gel X, and dipping powder, which means the recommendation you get is based on what actually works for your nails, not what happens to be in stock. Here is how the salon approaches the three most common client goals.
For maximum wear: Acrylic or hard gel, applied over a properly prepped nail with a well-built apex. Both hold up to 3–4 weeks between fills. Foxynailsreno’s acrylic and gel services are built around this standard.
For the healthiest option: Gel X. The soft-gel tip system used at Foxynailsreno is soak-off removable, flexible, and lighter on the natural nail than rigid acrylics. Clients who have had damage from previous sets often find this the best re-entry point.
For the quickest appointment: Gel X again, or a gel manicure with a shorter tip. Soft-gel tip application cuts chair time significantly compared with sculpted acrylic, which is useful if you are working around a tight schedule.
- Full sets, fills, and removal-plus-treatment appointments are all available at the salon.
- For complex removals, especially hard gel or overdue acrylic sets, professional removal at Foxynailsreno protects the nail plate in a way that home removal simply cannot replicate.
- Nevada-licensed technicians handle every service, which matters when the stakes involve your nail health.
Check out real client reviews to see how the salon’s approach translates in practice.
Key Takeaways
The single most important rule across every nail extension method is this: the removal process, not the product itself, determines whether your natural nails stay healthy.
| Point | Details |
|---|---|
| Match method to skill level | Beginners should start with press-ons for casual wear or soft-gel tip kits for a professional-style result at home; sculpted acrylic and hard gel need professional technique. |
| Three-week maintenance window | Soft-gel tips last 2–4 weeks; schedule fills or a fresh set at three weeks to prevent apex shift and lifting. |
| Soak-off vs. file-off matters | Soft-gel tips and polygel soak off in acetone; hard gel always requires professional filing to protect the nail plate. |
| Check labels before you buy | Look for HEMA-free and soak-off language on any gel kit; confirm lamp wattage is at least 36 watts. |
| Foxynailsreno for professional sets | Foxynailsreno in Reno, NV offers acrylic, hard gel, and Gel X services with licensed technicians and professional removal. |
Foxynailsreno brings expert extensions to Reno
If you’ve read this far and realized that the method you want, whether that’s a long-wear acrylic set, a Gel X application, or a safe removal of an old set, is beyond comfortable DIY territory, Foxynailsreno is the straightforward next step. The salon offers acrylic, hard gel, Gel X, and dipping powder services performed by Nevada-licensed technicians who prep, build, and remove with the kind of precision that protects your natural nail rather than sacrificing it.
What makes the difference at a dedicated nail salon versus a kit at home is not just the products. It’s the e-file technique, the apex placement, the cuticle-line discipline, and the professional removal that keeps your nail plate intact set after set. Foxynailsreno’s clients consistently come back because the results hold and their nails stay healthy underneath.
Browse the gel nail services and nail design gallery to see finished sets and book your appointment in Reno, NV.